Lightroom Classic Plugin
Compatibility
Recent changes to Adobe Lightroom Classic have affected the use of the plugin.
Windows
The plugin will no longer work for any camera that is natively supported by Lightroom Classic itself. Cameras that are not natively supported by Lightroom Classic but are supported by Smart Shooter 5 should continue to work as usual.
macOS
The following startup sequence must always be used:
Quit all applications, including apps running in the Menu Bar
Launch Smart Shooter 5 and then connect the camera. Ensure the camera shows up in Smart Shooter 5 as expected
Launch Lightroom Classic and start the tethered session as usual.
Note
Windows users who would like to use a previous version of Lightroom Classic to restore Smart Shooter 5 Lightroom Classic plugin functionality can do so. To install a previous version of Lightroom Classic, please use these instructions. See the version numbers below to identify the correct version based on the supported camera model you are using.
Sony - version 13.2, or earlier
Nikon - version 13.5.1, or earlier
Canon - Not supported for use with the plugin, was never supported
FujiFilm – Latest version, no need to install a previous version.
Installation
Installing the Smart Shooter 5 Plugin
Launch Smart Shooter and go to Preferences -> Lightroom
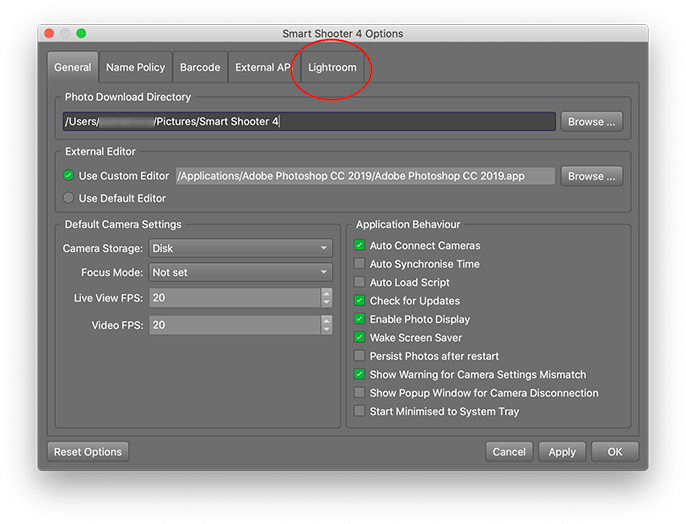
Install Plugin and enable LR connection
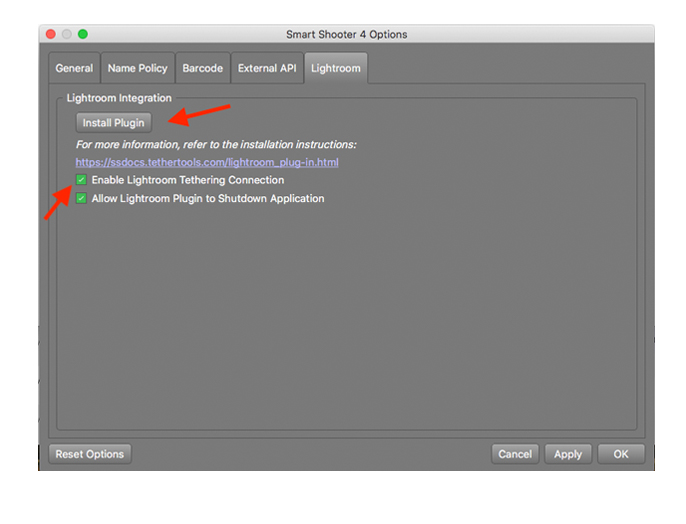
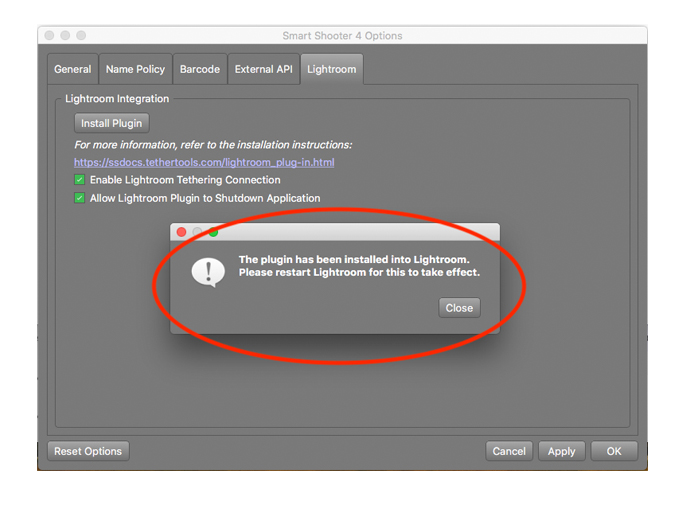
If Lightroom Classic is currently open, close and relaunch.
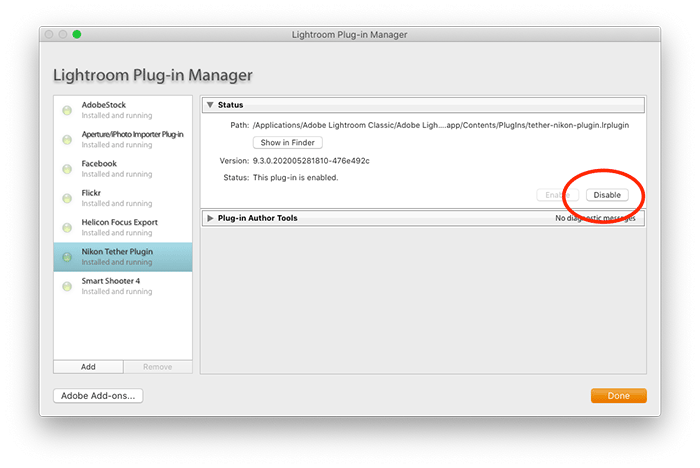
In Lightroom Classic go to File -> Plug-in Manager
Enable Smart Shooter 5 Plugin to support tethering with Sony and Nikon. Disable Nikon Tether Plugin.
Please note, if you want to use the native Lightroom Classic tethering for Nikon, do not disable Nikon Tether Plugin and do not enable the Smart Shooter 5 Plugin. To avoid tethering communication conflicts only have one tethering plugin enabled at a time.
Canon is not currently supported in the Smart Shooter 5 Plug-in. Full Canon tethering functionality is available in Smart Shooter tethering software, which is included as part of the Lightroom Classic Plugin package. Lightroom Classic Plugin support for Canon is pending an upcoming Adobe update.
Begin Tether Session in LR like you normally would with Nikon, Sony or Canon (coming soon).
File -> Start Tethered Capture
Smart Shooter will launch as a service on the Mac toolbar or in the taskbar on Windows.

The first time you launch Smart Shooter you will be asked to register. A license code was provided to you in a separate email at the time of purchase.
Begin tethered capture using the Lightroom tether bar or open the full version of Smart Shooter from the taskbar to access advanced camera controls and features.
How are Files handled
When tethering using the Smart Shooter Plugin, all files will reside in the Lightroom Classic catalog and Lightroom Classic specified designated file structure. The image files immediately and automatically flow through Smart Shooter and are transferred to the folder destination designated in Lightroom Classic.
If you open the Smart Shooter user interface and work in Smart Shooter, but are connected to the Lightroom Classic Plugin, the files are handled the same way. The files will automatically move into the Lightroom Classic Catalog regardless of the folder path set in the Smart Shooter preferences.
When working directly in Smart Shooter, not using the Plugin, image files will reside in the folder path designated in Smart Shooter (Preferences->Photo Download Directory).
Naming Policies
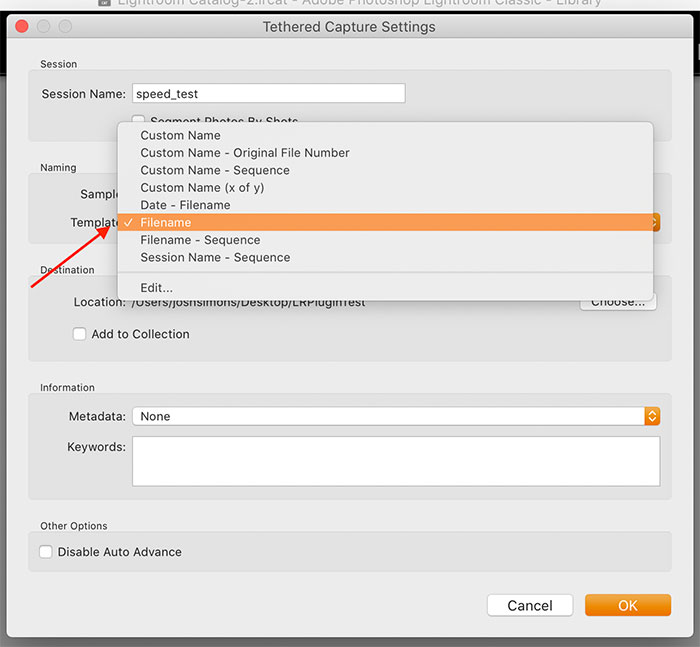
If you would like to use Lightroom Classic for naming policies, proceed as you normally would in a Lightroom Classic tethering session.
To utilize the advanced naming policies, barcoding, multi-camera designations or other Smart Shooter features, select “Filename” from the drop-down menu. By selecting “Filename” you are telling Lightroom Classic to use the filename coming out of Smart Shooter. Smart Shooter has a lot of flexibility and customization in its naming policies.
Working in Lightroom Classic versus Smart Shooter 5
When working in Lightroom Classic, start a normal tethering session by going to File-> Tethered Capture. The Smart Shooter tethering engine will be launched and all images will flow through Smart Shooter and into Lightroom Classic. You will be able to use all standard Lightroom tethering features.
If you would like to access the advanced Smart Shooter tethering features, launch the full Smart Shooter program from the Smart Shooter icon in the taskbar. All images will continue to import directly into the Lightroom Classic Catalog.
Switching Cameras versus Multi-Camera
If you have multiple cameras connected to your computer, and working in Lightroom Classic, you will have access to switch back and forth between those cameras using the Lightroom Classic tether bar. When a camera is selected you can change its setting and fire the camera. You can only work with one camera at a time.
If you would like to work with all the cameras simultaneously you will need to work directly in Smart Shooter. In Smart Shooter, you will be able to adjust, maintain and fire all cameras at the same time. However, with the plugin activated all image files will continue to import directly into the Lightroom Classic Catalog.